The Art of Collage
My first tentative steps into the world of collage were way back in primary school. I remember enjoying the process of choosing something to stick down and slathering the back with lovely, gloopy glue before pressing it down and smoothing out the air bubbles. I remember enjoying running my fingers over the freshly laid paper and using a glue spreader to push yet more glue underneath any edges that weren’t quite stuck. I found it a very satisfying and calming process. The messy bit afterwards was always fun too, picking off the dried glue from my hands (gave me something to do in assembly) or clapping my hands together to create what I called ‘spiderwebs’.
I fell back in love with collage in my early twenties, but this time turning to decoupage. In my eyes, decoupage is a fancy word for collage using slightly different materials, though I know it is also a very skilled craft for some. I’m a ‘give it a go and see’ type of creative, preferring to learn as I go and try things out.
I would spend hours working through magazines, old maps and other papers to choose colours, textures and elements I liked, often grouping them into themes. I used to tear out the bits I liked, rather than use scissors, because the lovely fanned edges added depth and texture as well as being an enjoyable activity in itself. If you have torn paper into tiny pieces in a while then why not give it a go! It’s a great way to vent your pent up emotions.
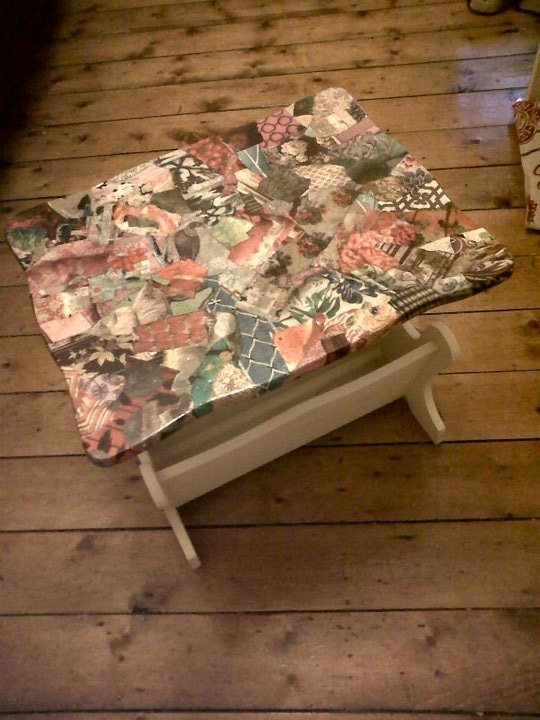
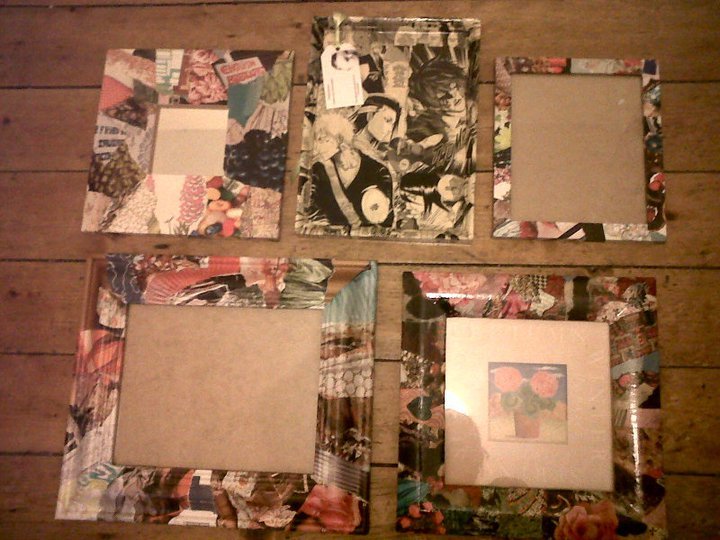
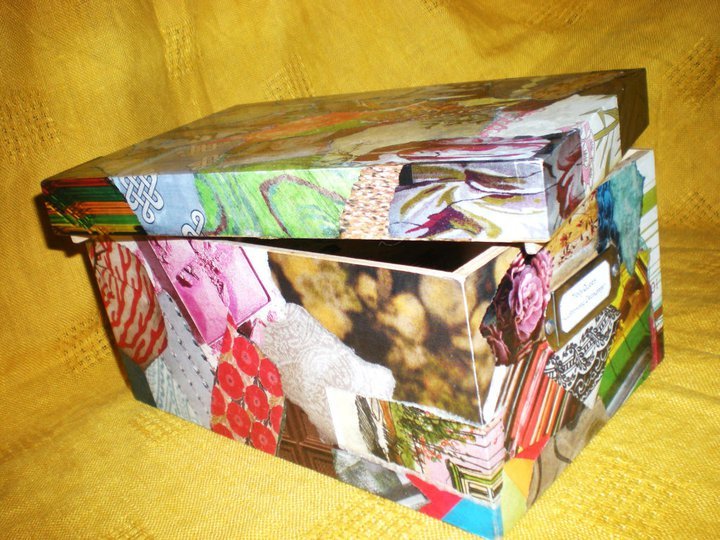
After collecting all my bits and bobs together, I used wallpaper paste to cover frames and small pieces of furniture, before finally sealing them with layers of varnish to create a lovely smooth finish. Here are some pictures of some pieces I made around 15 years ago… I wonder where they got to?
I’m not sure exactly why I stopped decoupaging, but life took over for a while and it wasn’t for another decade or so until I returned to the joys of collage. I now have two sketchbooks dedicated to exploring different styles, I find this a gentle way to explore how different elements interact. I also love looking at art work by other artists, being inspired by different ways of working.
One of the hardest bits of collage for me, is knowing when to stop. My method for this is not being too hasty with the glue. I take time to create a finished piece, sometimes leaving it unstuck for weeks at a time until I am confident that the pieces are in the right place.
If you’d like to give collage a go yourself, there are a few activities involving this medium on our activities page. Here are some tips for engaging with any collage activity:
Tools and materials
You can use scissors or craft knives for neat edges, or your hands to tear your materials. Rough edges and accidental rips add intrigue and depth to a piece.
Glue - you can use a variety of glue types, I sometimes use PVA if I don’t mind being messy, or a glue stick is fine. You could also explore using wallpaper paste and a paintbrush to see if this works for you.

Choosing your materials - you can stick pretty much anything onto anything these days. Paper is a great place to play, but you could also make a ‘mixed media’ piece which includes recycled treasure from your recycling pile, fabric, natural treasure (think leaves and feathers) or anything else that you can think of. You could also add other mediums, including paint, sewing techniques or pens and ink.
You could use a piece of paper as a canvas, or a page in a notebook or sketchbook, a piece of card, or even an obscure item from a charity shop.
Collage Fodder; magazines, newspapers, letters, print outs, junk mail, flyers, posters, photographs, stickers, books (we only use ones that are damaged beyond repair because we like books). Do be careful if you are using sentimental items, sometimes its best to take a photocopy for cutting and keep the original one safe.
Deciding what to make:
I find it helpful to think of the collage as ‘wanting to be made’. This helps me to see myself as a pair of hands, helping to find the right place for each piece. This helps me try out lots of different layouts, tucking bits behind or in front and waiting to see which position feels ‘right’.
You could also take a very random approach, by standing above your work and dropping pieces from a short height above the paper. Where do they land? Are there any pieces that land perfectly? Do any need a little nudge to one side? Do you like what you see? Why not try dropping the pieces one at a time or all at once. Which method do you prefer?
It can help to have a theme in mind; here are some that might help you in deciding where to start:
Opposites - choose to include big and small. Dark and light. Loud and quiet.
Colour - look for yellows, greens or pastels. Choose a rainbow or go for grey.
Contrast - black and white images mixed with colour. Modern with vintage.
Perspective and size - mix up logic and reality. Have items out of place, for example a huge chair next to a tiny house. Or a checkerboard sky.


Top tips
Leftovers - whatever you choose to make, keep a place for all your little off cuts, outlines and discarded bits. Sometimes, these are the perfect piece to fill in a gap, or add a small detail to your work.
Save the glue until last - once you have settled on a layout, leave it somewhere safe where you can look at it every now and again. You might want to play around with it some more before you stick it down. Let it settle and then when you are ready, grab the glue.
I hope this helps you to feel more comfortable exploring the world of collage, we’d love to see what adventures you get up to. Share any images using the #selfcarescrapbook tag to help us share the love and inspire our creative community.
Peace and glue sticks,
Lauren Thortify